
When I started this journey into the world of Planner Stickers, I wanted to make sure that any files I created were accessible and useable by everyone. Some popular shops that offer a digital option only cater to those that have a Sihouette, which is great but if you’re like me and have a Cricut that doesn’t really help you with cutting out their product(s).
I have spent many hours researching, watching YouTube videos and test cutting myself to make sure that I found the easiest way to Print then Cut my products using the Cricut Design Space software and a Cricut. So, let me show you how to print and cut with the Cricut.
All my test Print then Cuts have been done on a Cricut ExploreAir 2. I also found that using Google Chrome allowed for the biggest printable area.
Log into Design Space and create a new canvas.
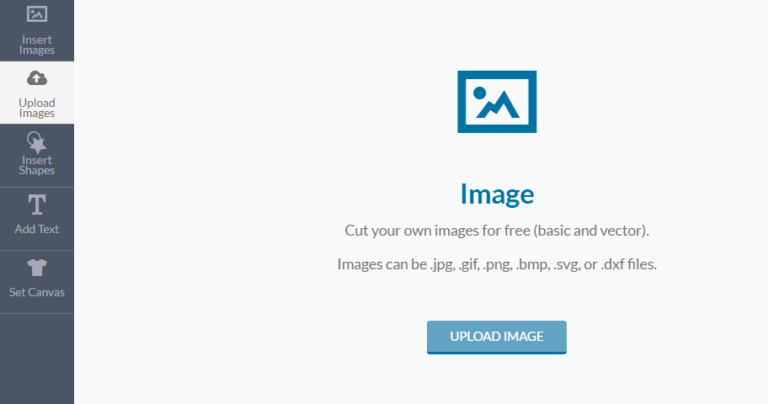
Then click on “upload images” and chose “Upload Images” as your option.
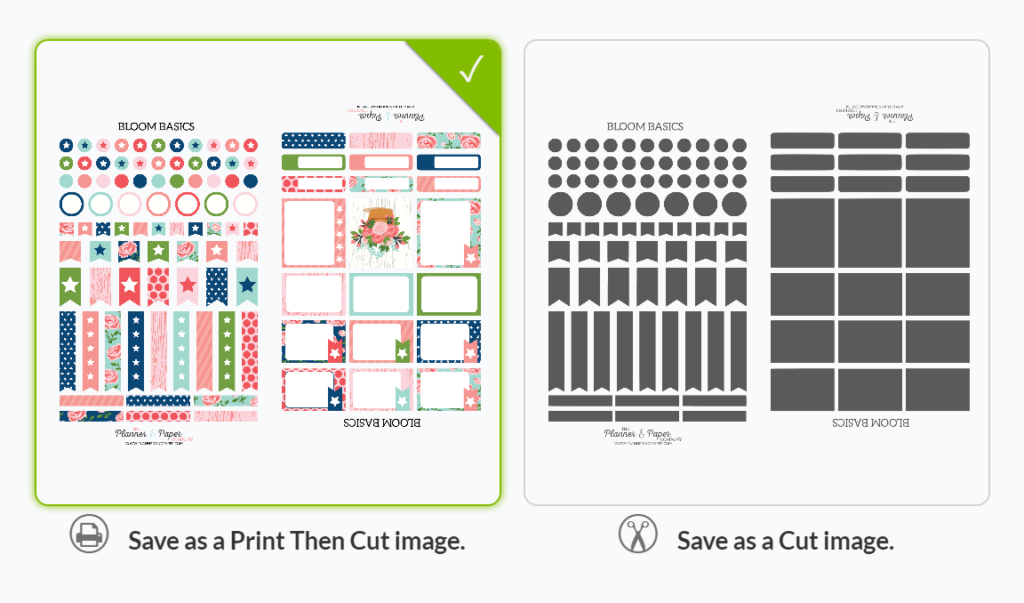
Then select “Browse” to find and select the file from where you have it saved. I will be using Bloom Headers for this example.
Once you have selected your file and clicked “okay” you will come to the screen below.
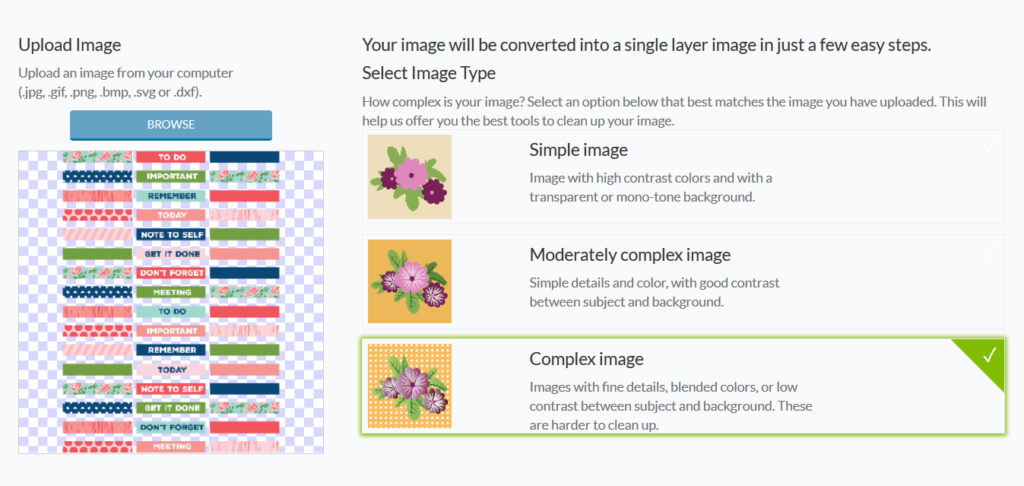
Select “Complex Image” and then continue. Even though my Print & Cut files are saved with a transparent background, choosing complex image helps keep the finer details – colors, text and the details – of the stickers intact. Click Continue.
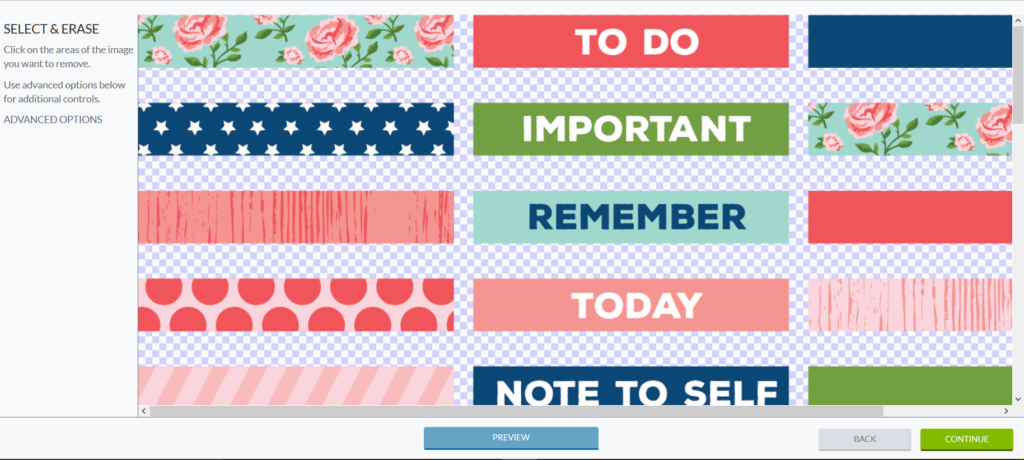
The next screen will allow you to erase the background image, if there was one. Since The Planner and Paper Company Print then Cut files are saved with a transparent background, this step is unnecessary. Click Continue.
You will now save your uploaded file as a “Print Then Cut image”. This process may take a few minutes. I wait until I see the cut image load in the right hand “Cut image” square. Click Save.
Your file is now saved as a Print Then Cut image. Now it’s ready to be inserted onto the canvas, print and cut. I promise, this is easy! Once your file has finished saving, you will be taken, hopefully, to the screen below.

Select your image, and then click on “Insert Images”. You’ll be taken to your canvas and the image, for some reason, isn’t the correct size for printing and cutting.
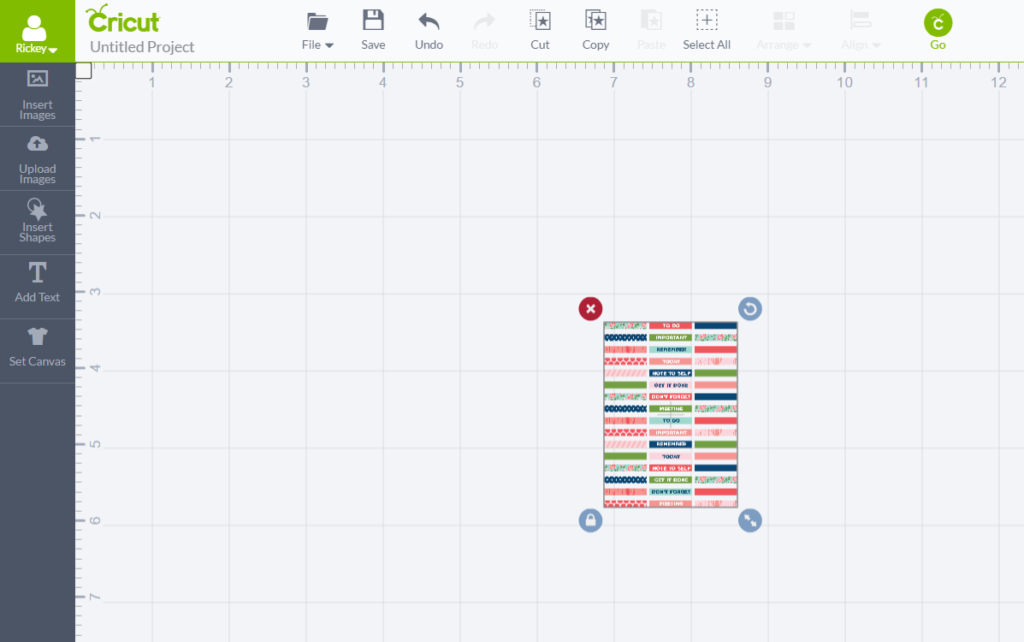
Now, I know tiny little stickers are cute, but I also like functional stickers in my planner. So, let’s make these babies their correct size, shall we? On the right of the design space is the layer’s list, which is also where you can also edit your image. Click “edit” and open the screen where you can change the size of the image.
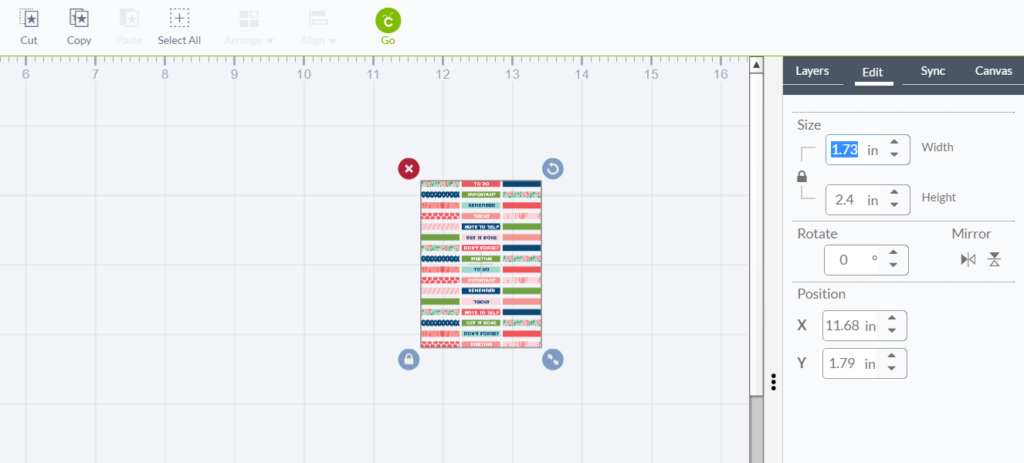
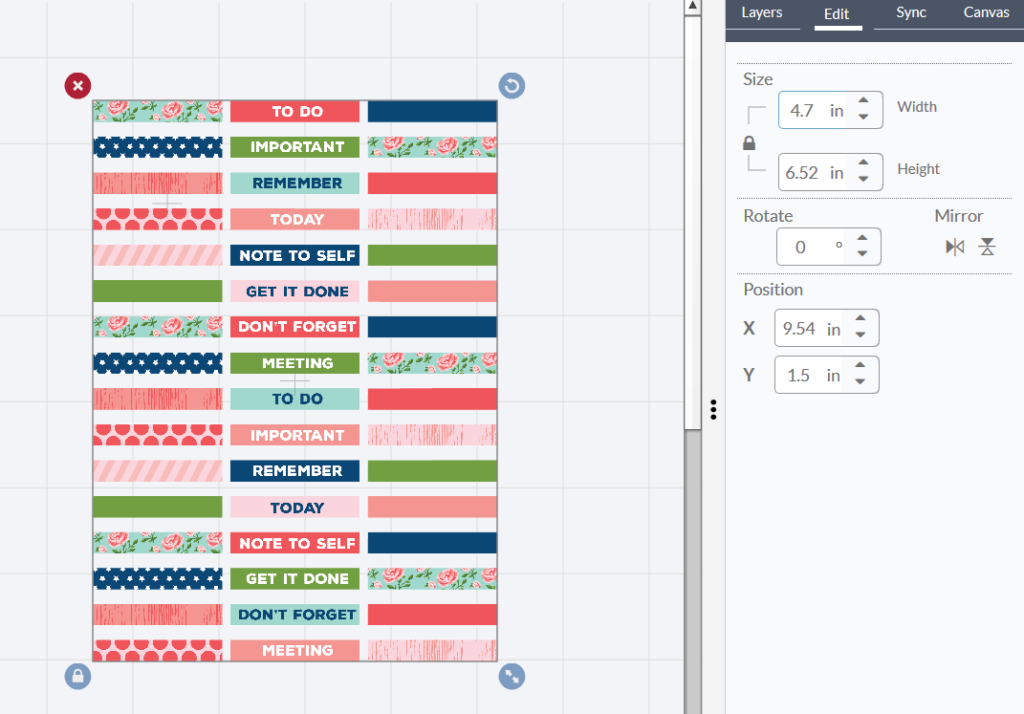
Here’s the size that Cricut imports the image to. Highlight the width size and type 4.7 into the text box. Hit enter and the height should update itself. There’s no need to change the height, as long as the width is 4.7 inches, the stickers should print at the correct size.
That’s it! That’s all there is to get you on your way to printing and cutting your stickers!
Now let’s click the “Go” button. If you’ve never done a Print then Cut like this, there’s a few things to note. If you’re an experienced sticker printer, then you can just follow the prompts and enjoy your stickers!
So, after clicking “Go” you’ll arrive at this screen. If you’ve ever cut anything with your Cricut, you’ll be familiar with this screen.
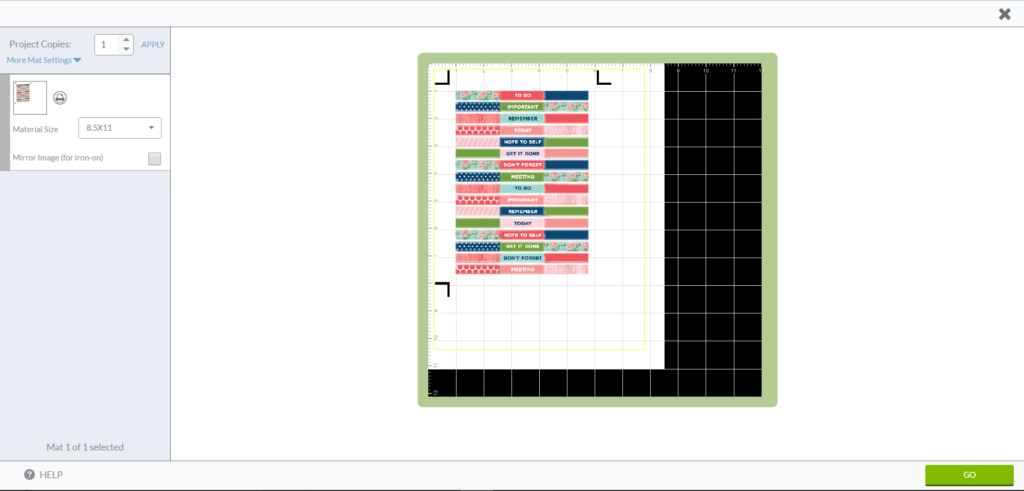
Click on “More Mat Settings”. Make sure the “Bleed for Print then Cut” is checked. This will add in a bleed to the image before you print. I had to trim off the built-in bleed to create the perfect Print then Cut file.
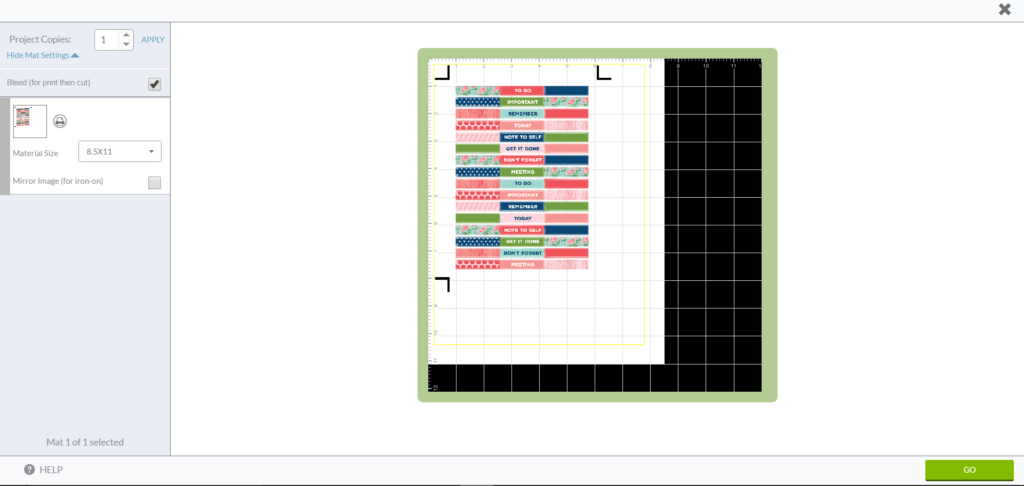
Then Click “Go”.
This is the last screen in the process, so close! Still a few more steps, but you’re close!
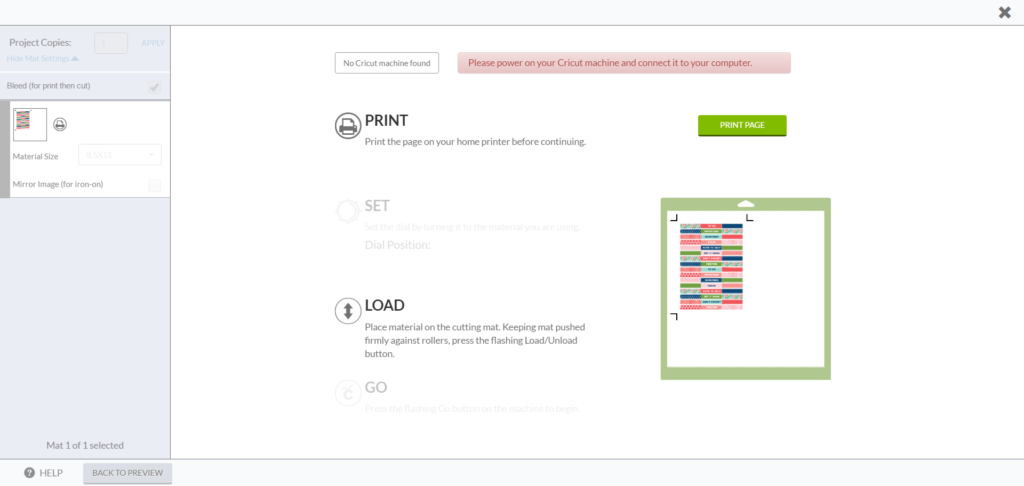
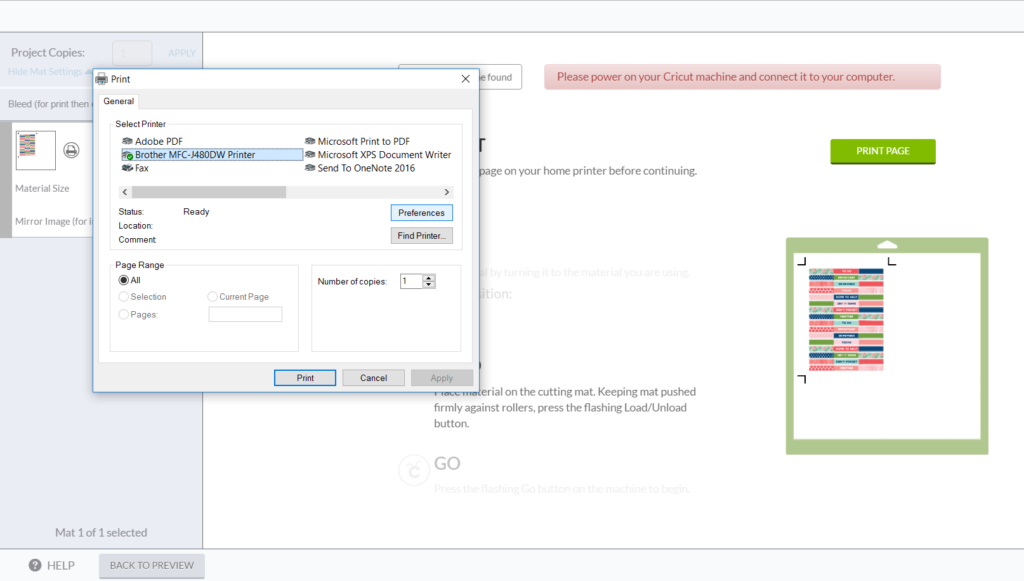
You’ll need to print your image before moving on with the cutting of your stickers. Click “Print Page” and you’ll be taken to the screen below.
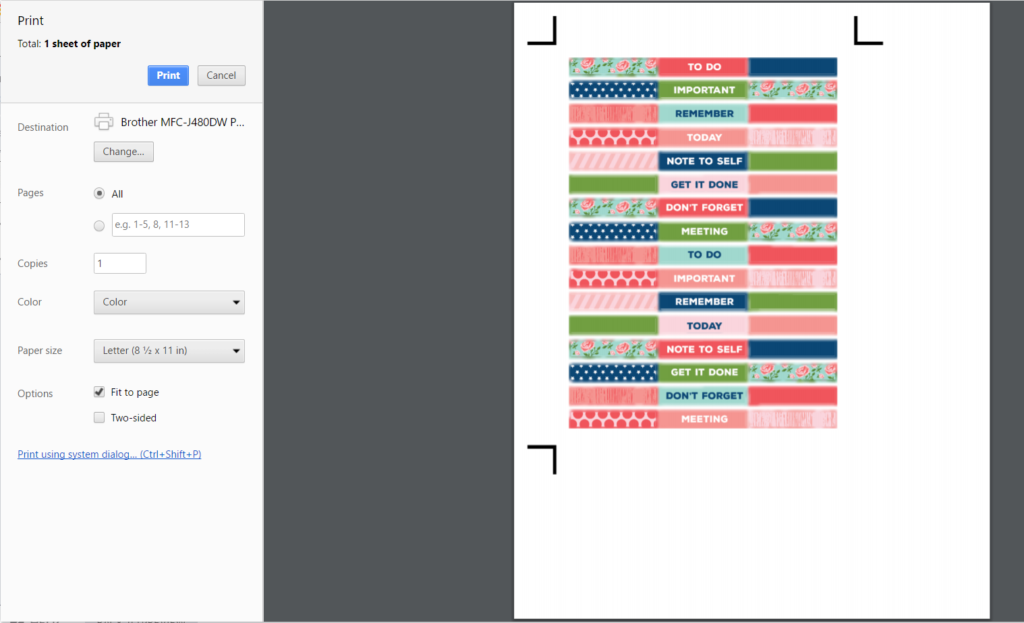
You can just click “print” at the top. This print is a “quick” print. If you prefer a “best” print, this is the type of printing I do for all of my Print then Cuts. Click on the link “Print using system dialog”. It will bring a pop-up, similar to what you usually see when printing, that will allow you to change your print preferences. Since every printer differs in the menu option, I skipped screenshots for this process. Set your options to fit your paper and print quality and then click “Print”.
Once your page, plus the registration marks, have printed and dried – depending on your print settings and paper – follow the steps to load and cut your image. If this tutorial does not work for you and you have questions, please contact us at customerservice@18.216.5.139 and I will try to help you resolve the problem.